【Unity】空間を歪めてポータルのようなエフェクトをつくる
はじめに
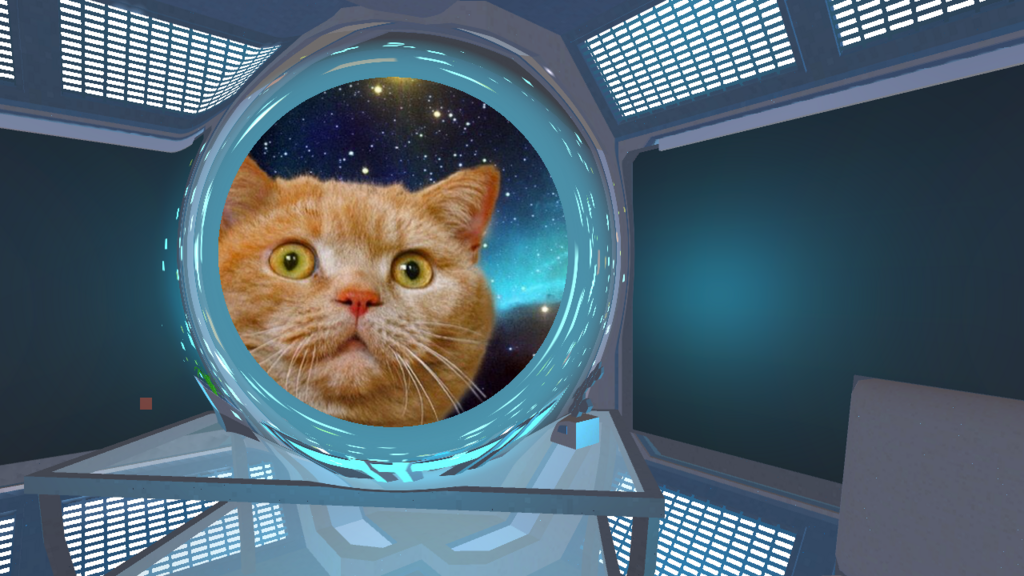
帰省の新幹線の中でこういうポストプロセスエフェクトを作ったので、作り方を紹介します。
空間の歪めかた分かってきました
— setchi (@setchi) 2017年12月28日
(新幹線で楽しくシェーダー勉強してます) pic.twitter.com/oyKSAV9sSt
実装方針
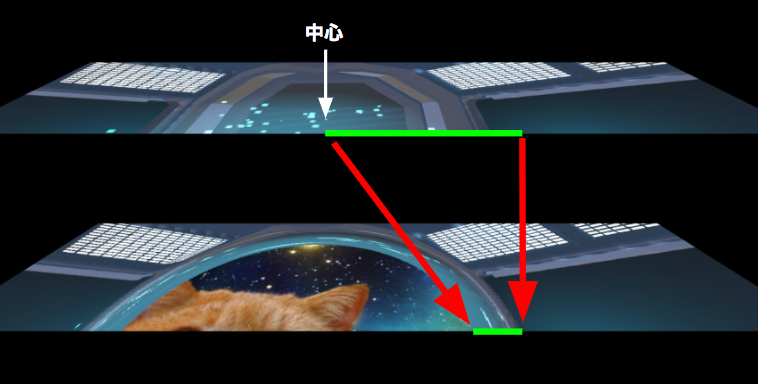
ポータルの中心から一定距離内のピクセル(緑色の範囲)を外側に圧縮して、広がった分だけ内側に違う絵を描画します。

実装
ShaderLab
Shader "Custom/Portal"
{
    Properties
    {
        _MainTex ("MainTex", 2D) = "white"{}
    }

    CGINCLUDE

    #include "UnityCG.cginc"

    sampler2D _MainTex;
    sampler2D _SubTex;
    float _Aspect;
    float _Radius;
    float2 _Position;

    float4 frag(v2f_img i) : SV_Target
    {
        float width = 0.07;

        // 自身のピクセルからポータル中心までの距離
        float distance = length((_Position - i.uv) * float2(1, _Aspect));

        // 自身のピクセル位置での歪み具合
        float distortion = 1 - smoothstep(_Radius - width, _Radius, distance);

        // 自身のピクセル位置での歪み具合分だけ
        // ポータル中心の方へずらした uv を計算します
        float uv = i.uv + (_Position - i.uv) * distortion;

        // 計算した uv で _MainTex のカラーを出力します
        // ポータル内に違う絵を出すために、
        // lerp + step で出力テクスチャを切り替えています
        return lerp(tex2D(_MainTex, uv),
                    tex2D(_SubTex, i.uv),
                    step(1, distortion));
    }
    ENDCG

    SubShader
    {
        Pass
        {
            CGPROGRAM
            #pragma vertex vert_img
            #pragma fragment frag
            ENDCG
        }
    }
}
カメラ用C#スクリプト
マウスダウンでマウス位置にポータルが開くように、シェーダのプロパティを操作しています。
using DG.Tweening;
using UnityEngine;

public class Portal : MonoBehaviour
{
    [SerializeField]
    Material material;
    [SerializeField]
    Texture texture;
    [SerializeField]
    float radius = 0.15f;

    void Start()
    {
        material.SetTexture("_SubTex", texture);
    }

    void Update()
    {
        var mousePosition = Input.mousePosition;

        var uv = new Vector3(
            mousePosition.x / Screen.width,
            mousePosition.y / Screen.height, 0);

        material.SetVector("_Position", uv);
        material.SetFloat("_Aspect", Screen.height / (float) Screen.width);

        if (Input.GetMouseButtonDown(0))
        {
            OpenPortal();
        }
        else if (Input.GetMouseButtonUp(0))
        {
            ClosePortal();
        }
    }

    float currentPortalRadius = 0;
    void OpenPortal()
    {
        DOTween.KillAll();
        DOTween.To(() => currentPortalRadius, SetPortalRadius, radius, 2f).SetEase(Ease.OutBack);
    }

    void ClosePortal()
    {
        DOTween.KillAll();
        DOTween.To(() => currentPortalRadius, SetPortalRadius, 0f, 0.6f).SetEase(Ease.InBack);
    }

    void SetPortalRadius(float radius)
    {
        currentPortalRadius = radius;
        material.SetFloat("_Radius", radius);
    }

    void OnRenderImage(RenderTexture src, RenderTexture dest)
    {
        Graphics.Blit(src, dest, material);
    }
}
補足
OnRenderImage を実装しているので、C#スクリプトはカメラにアタッチしてください。
アニメーションにDOTweenを使っているので、アセットストアからインポートが必要です。
https://www.assetstore.unity3d.com/jp/#!/content/27676
また、
material.SetFloat("_Radius", size);
上記のようにマテリアルにパラメータを渡している部分は、Shader.PropertyToID メソッドを使ってIDで参照した方がパフォーマンス的には良いです。今回は説明用にシンプルにするために使いませんでした。
readonly int radiusPropertyId = Shader.PropertyToID("_Radius");
void SetPortalRadius(float radius)
{
    currentPortalRadius = radius;
    material.SetFloat(radiusPropertyId, radius);
}
